Campervan Solar Panel Installation Guide
Want to unlock the true potential of your campervan? Looking to roam free and travel off-grid without having to find a pitch with mains power or run the engine to charge your leisure battery? If you answered yes to either of those, solar panels could be your answer.
You can install solar panel kits onto your campervan roof and generate free, renewable energy whether you’re driving, parked or in storage.
We’re fitting solar panels to our homes, so why not our home-from-home too?
Sunstore Solar provides industry-leading solar panels for campervans either as kits for DIY installation or as part of a full professional installation by our expert team.
For those who want to try their hand at fitting solar panels to their own campervan, we’ve provided a brief guide to the DIY process below.

Can you fit solar panels to a campervan?
Yes, you can fit solar panels to a campervan. As long as you have enough free roof space to place them, you can fit panels to just about any make or model of van.
The solar panels we provide in our DIY solar panel kits here at Sunstore Solar are light, reliable and very efficient. They are ideal for fitting to campervans and should provide many years of renewable energy.
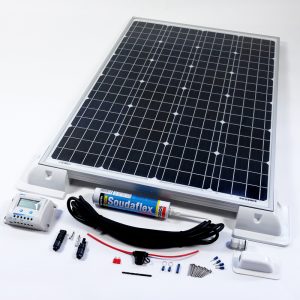
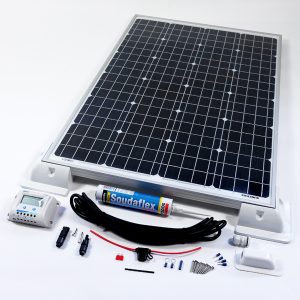
Our DIY solar panel kits come with everything you need including mounts, cables, screws, fuse, drill bit, charge controller and full installation instructions. You’ll also have our experienced team on hand to answer any questions.
What size solar panel do you need for your campervan?
The size of the solar panel you need for your campervan depends on how much energy you plan to use.
You want to be able to generate slightly more energy than what’s required.
To calculate what size 12v panel you need for your campervan, find out the amount of power you will require to run all your appliances such as your lighting, refrigerator, television, satellite and any other devices.
For example, if the total demand was 100 watts, you’ll need a solar panel that’s larger than this to power all your appliances effectively. Here, our 120W 12v solar battery charger kit would be ideal.
If you need help choosing the right solar panels for your campervan, contact Sunstore Solar today.
Wondering what type of solar panels you need?
If you have any questions or need a hand choosing the right solar panels for your project, get in touch with our team.
CONTACT USOur Most Popular Campervan Solar Panel Kits
Sale!
Out of stock
Original price was: £232.75.£209.48Current price is: £209.48. including v.a.t.
This product has multiple variants. The options may be chosen on the product page
Sale!
Out of stock
Original price was: £258.60.£232.74Current price is: £232.74. including v.a.t.
This product has multiple variants. The options may be chosen on the product page
Sale!

Price range: £253.67 through £271.96 including v.a.t.
This product has multiple variants. The options may be chosen on the product page
Fitting solar panels to campervans
Now you have an idea of which solar panel kit to buy, let’s cover the basics of how to fit the solar panels to your campervan.
The following is a general guide to fitting solar panels to campervans by drilling into the roof, or take a look at our 12v solar panel kit instructions. Each kit you buy from Sunstore Solar will come with full fitting instructions, including any component-specific requirements…
Step 1: Check the solar panel kit
First, check to make sure you have everything you need. Solar panel kits from Sunstore Solar will include all the parts required for installation, but it’s good practice to check anyway.
Campervan solar panel fitting, like any DIY project is mainly about the preparation. Get that right and you’ll be fine!
Get your tools together too. You should only need basic hand tools and a drill.
Step 2: Clean the roof
Your solar panels will be going on the roof of your campervan, so make sure it’s clean to start with.
Some solar panels for campervans will use adhesive to secure the mount into place, while others require drilling.
To give it the best chance of adhesion, thoroughly clean the roof of your campervan to ensure everything sticks and stays put.
Step 3: Fix the mounts to the panel
Solar panel mounts hold the panel in place and will typically be secured with screws. Some panel mounts will come with screw holes already drilled while others may require drilling.
The instructions that come with your kit will tell you which is which. Either way, screw the panel onto the mount according to the provided instructions so it’s ready to install.
Take care not to damage the back of the glass panel when drilling.
Step 4: Secure the solar panels to your campervan roof
Position the panel and mount it onto your roof, and be sure not to block any vents or aerials.
Mark those positions and mark where you need to drill a hole for wiring.
If you’re using multiple panels, do this for all panels until you’re completely happy with their position. Check the instructions for details on how to position multiple panels.
Once the hole is in a good position and doesn’t interfere with anything on the interior, drill the holes in the marked places using the appropriate drill bit provided in your kit.
Feed the cable through the roof, using the included gland to provide a waterproof seal around the hole.
Step 5: Prepare the wiring
Each solar panel included within the kit will have its own cables and wiring requirements. Follow the instructions carefully, cutting off the necessary lengths of wire to fit in place and preparing the cables to connect with the other components as shown in the diagrams.
Fit the MC-4 connectors to each cable but do not connect to your battery or insert the fuse yet.
Step 6: Install the charge controller
The charge controller regulates energy supplied by the solar panels to ensure your campervan’s leisure battery is not overcharged.
Secure it into place inside the campervan, somewhere easily accessible and within 1 metre of the battery. Here, you can consult your charge controller manual for mounting instructions.
Using your prepared cables, connect to the charge controller with the appropriate connector, and then prepare the wires ready for the battery terminals – but don’t connect to the battery just yet.
Step 7: Final check
Check that everything is tight and correctly wired, making sure all the connectors are securely fitted to the cables and wires are tightened into the terminals.
Perform any tidying up or securing of wires now, before we connect everything up.
Once you’re happy with the wiring, insert the fuse and connect to the battery.
If you have followed the instructions carefully and your system isn’t working, double-check all connections against the wiring diagram. If in doubt, contact one of our team for help.
Need a helping hand with the installation process?
If you have any questions or are struggling to install your own solar panels, speak with our friendly team and we can guide you in the right direction.
CONTACT USThe best solar panels for a campervan roof
The best solar panels for a campervan roof use quality components, efficient panels and reliable charge controllers.
Sunstore Solar specially selects all components because they deliver the perfect balance between cost and quality.
We offer a broad range of campervan solar panel kits that include pop-tops and semi-flexible panels and vary in aesthetics and weight.
Remember to check your total energy requirements to choose the right solar panel kit for your campervan.
We hope you found this guide helpful. Good luck fitting solar panels to your campervan!
If you need assistance with the installation of your campervan solar panels, contact Sunstore Solar for support.
Make an Enquiry
Please fill in the form below and we will aim to get back to you within 1 working day or call us on 01903 213141
[logo-carousel id=brands-solar]